

Step by Step process to display external data in salesforce via Salesforce External Object + Heroku Connect + Heroku Postgres


Introduction
Salesforce External Objects are a key component of Salesforce Connect, a data integration feature that enables Salesforce to access data stored externally in real-time without duplicating it in the Salesforce database. Here are some essential aspects of this technology:
Real-time Integration: External Objects allow users to view, search, and modify data stored outside Salesforce in real-time. This ensures that any changes in the external data source are instantly reflected in Salesforce.
OData Protocol: Salesforce Connect typically employs the OData (Open Data Protocol) standard for integrating with external data sources. OData is a web protocol designed for querying and updating data, facilitating the liberation of data from application silos.
Appearance and Behavior: External Objects resemble and function similarly to standard or custom objects in Salesforce. They can be used in list views, record detail pages, reports, searches, and SOQL queries. However, due to real-time integration and data not being stored in Salesforce, there are some limitations compared to standard objects.
No Data Duplication: Real-time access to external data sources eliminates data duplication within Salesforce. This approach maintains a single source of truth and reduces data storage costs on the Salesforce platform.
Use Cases: External Objects serve as a valuable tool in situations where businesses have data distributed across multiple systems, such as ERP, HR systems, or other databases. They enable a unified view of this data within Salesforce without the need for migration.
Configuration Over Coding: Implementing External Objects in Salesforce typically requires configuration, such as defining the schema of the external data source, rather than extensive coding. This approach aligns with Salesforce's general philosophy of "clicks not code".
Salesforce External Objects offer a robust solution for businesses aiming to integrate various systems and present a unified, real-time view of their data within the Salesforce platform.
Alright, enough with the theory! You can find that information on any other site. Let's dive right into the step-by-step process of setting up external objects and data sources! Get ready for an exciting journey!
Prerequisites
Before we begin, it's important to ensure that you have all the necessary tools and accounts set up. Here's a detailed list of prerequisites you'll need to have in place before diving into the step-by-step process of setting up external objects and data sources:
Heroku Account: You'll need a Heroku account to access and manage the Heroku platform, which allows you to build, run, and operate applications entirely in the cloud. If you don't already have one, you can sign up for a free account here.
Heroku Postgres: This is a fully managed SQL database service provided by Heroku. It's essential for storing and managing your data in the cloud. You can add a Heroku Postgres database to your Heroku account by following the instructions here.
Heroku Connect Add-on: This add-on enables seamless data synchronization between your Heroku Postgres database and your Salesforce Org. It's a crucial component for integrating external data sources with Salesforce. You can learn more about Heroku Connect and how to add it to your Heroku account here.
Salesforce Org: A Salesforce Org is your organization's dedicated instance of the Salesforce platform. It's where you'll configure and manage your Salesforce applications, users, and data. If you don't already have a Salesforce Org, you can sign up for a free Developer Edition Org here.
With these prerequisites in place, you'll be well-prepared to embark on the exciting journey of setting up external objects and data sources within the Salesforce platform.
Scenario
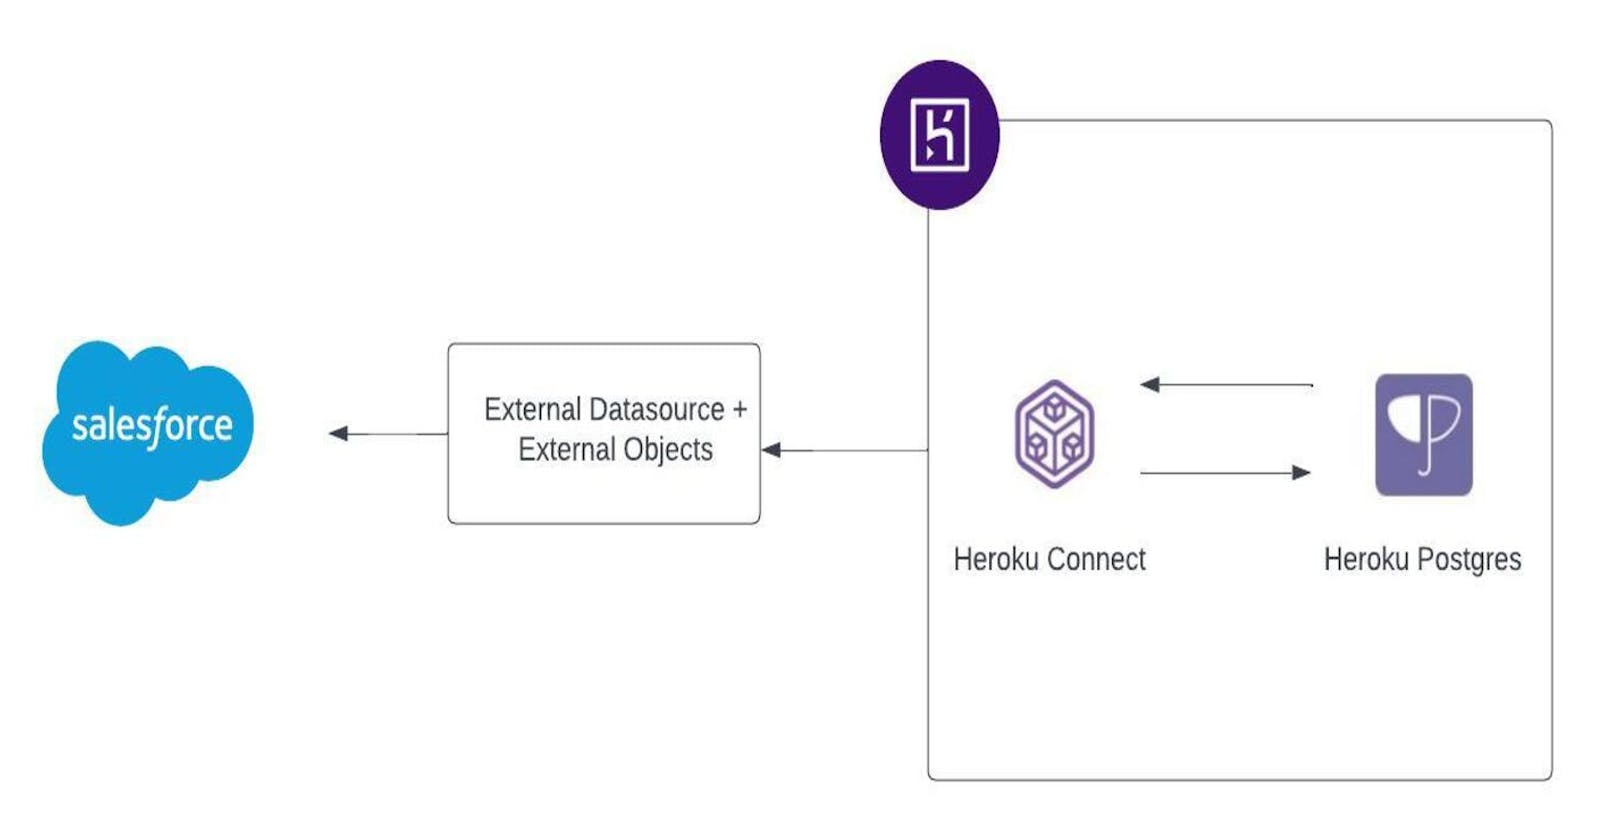
Heroku's Postgres Database already contains a collection of transaction data. Within this data, there is a foreign key called account_external that holds a unique identifier for each account. This unique identifier can also be found in our Salesforce environment, specifically within the Account Object, under the field name AccountExternalId__c. The goal is to seamlessly integrate the transaction data from the Heroku Postgres Database into the Salesforce platform, displaying it as a related list connected to the Account. This will allow for a more comprehensive view of account-related information and enhance the overall user experience within the Salesforce environment.
Step by Step visual process
Below steps are done to feed data to Heroku postgres database.
Create a new app in Heroku

Give any name and click "Create App" it. I am creating as
sfexternalobjectdemo.Head over to your app's
Resourcestab and addHeroku ConnectandHeroku Postgresas addons! The Heroku Connect demo edition is absolutely free, and while the Heroku Postgres Mini version isn't free, it's super affordable! Plus, you can simply remove it once you've finished your hands-on experience.
Now we would create a table and add some data to this database.
Now click on
Heroku Connect, this will do a SSO and take you to the configuration screen of Heroku Connect. ClickSetup Connection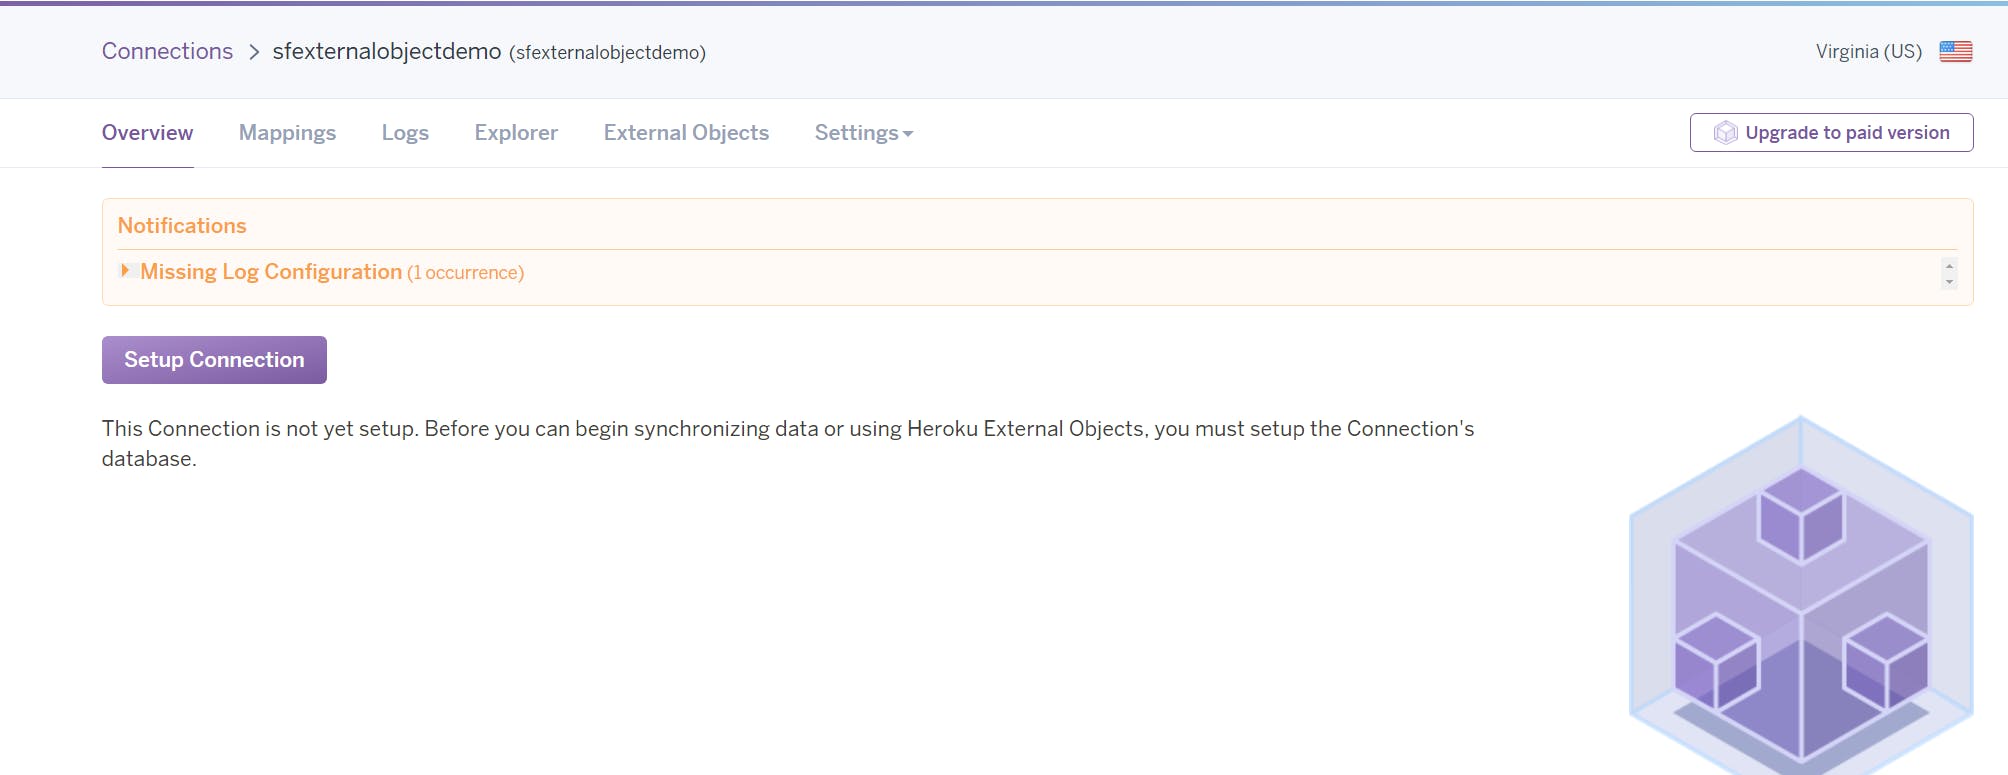
You can either change the schema, or let the schema be as it is. Click
Nextand Authorize your salesforce environment. Note: As we are not syncing data from a salesforce org, as of now, you can just ignore the Authorization and also clickSkip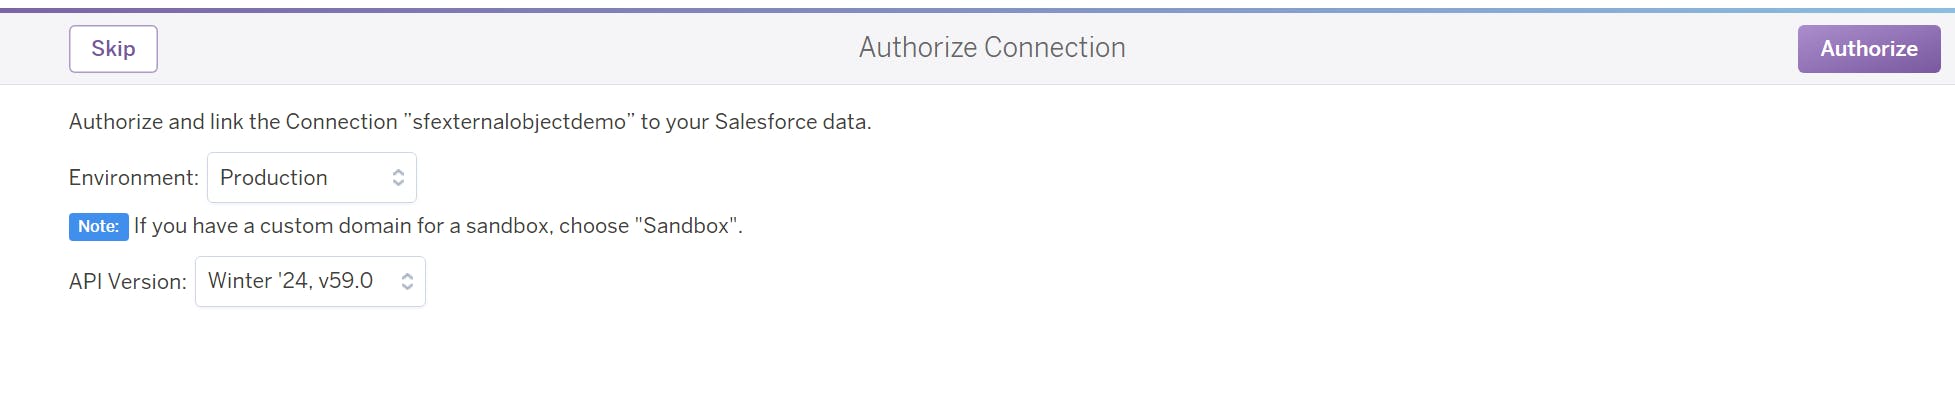
Now, with a SQL client create a connection to you Heroku Postgres. The database credential details can be found by clicking
Heroku Postgresand then navigation to Settings tab and clickView Credentials
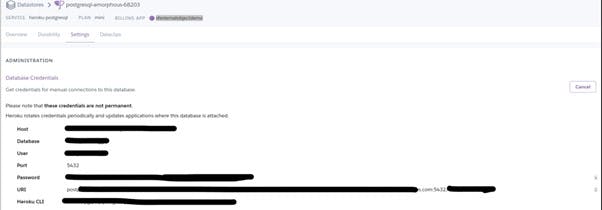
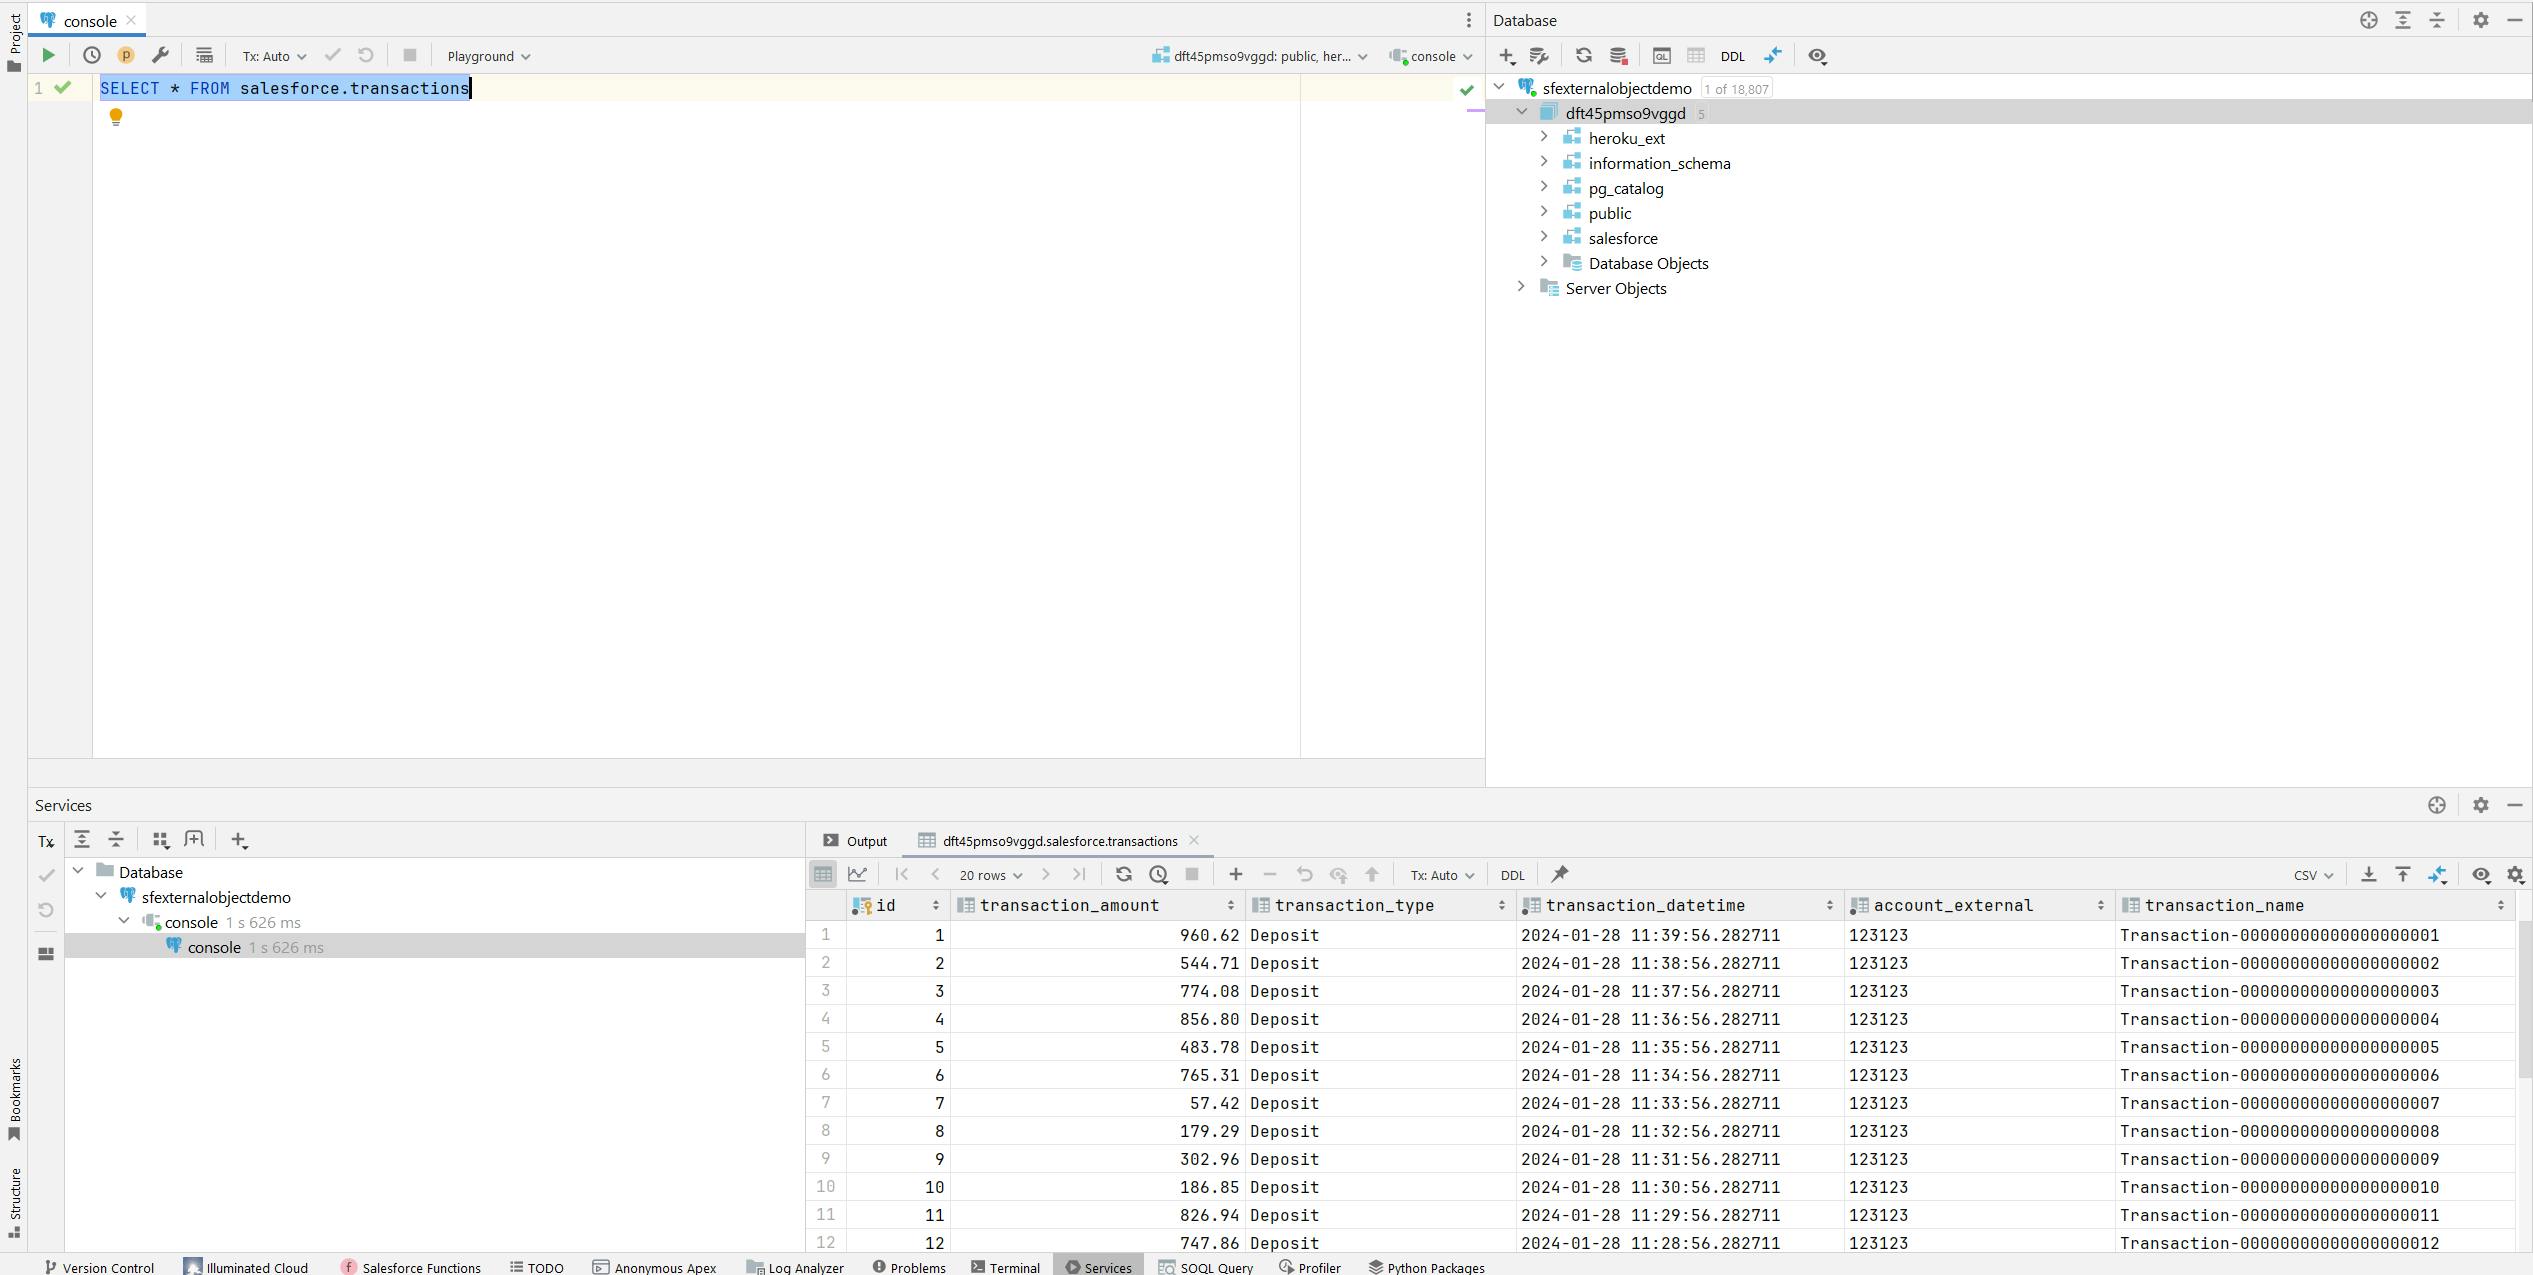
In this example, I'm using IntelliJ as my SQL client for convenience. To connect to your Heroku Postgres database, find the credentials in the Heroku Postgres dashboard under the Settings tab by clicking "View Credentials." After connecting, create a table to store your data.
I've hardcoded '123123' for demo purposes; in reality, this would be an external ID for our Salesforce account.
    CREATE TABLE salesforce.transactions (
                                                  id SERIAL PRIMARY KEY,
                                                  transaction_amount NUMERIC(10, 2),
                                                  transaction_type VARCHAR(50),
                                                  transaction_datetime TIMESTAMP NOT NULL,
                                                  account_external VARCHAR(18) NOT NULL DEFAULT '123123',
                                                  transaction_name VARCHAR(255)
    );
This should create Table named as
transactionsundersalesforceschema. Now lets add some dummy data.-- Insert Data in the table created above INSERT INTO salesforce.transactions (transaction_amount, transaction_type, transaction_datetime, account_external, transaction_name) VALUES (ROUND((random() * 1000)::numeric, 2), 'Deposit', NOW() - (interval '1 minute' * generate_series(1,20)), '123123', 'Transaction-' || LPAD(generate_series(1,20)::text, 20, '0'));Finally our Postgres database has some 20 transaction data.
Next, go to
Heroku Connectand navigate toExternal Objectstab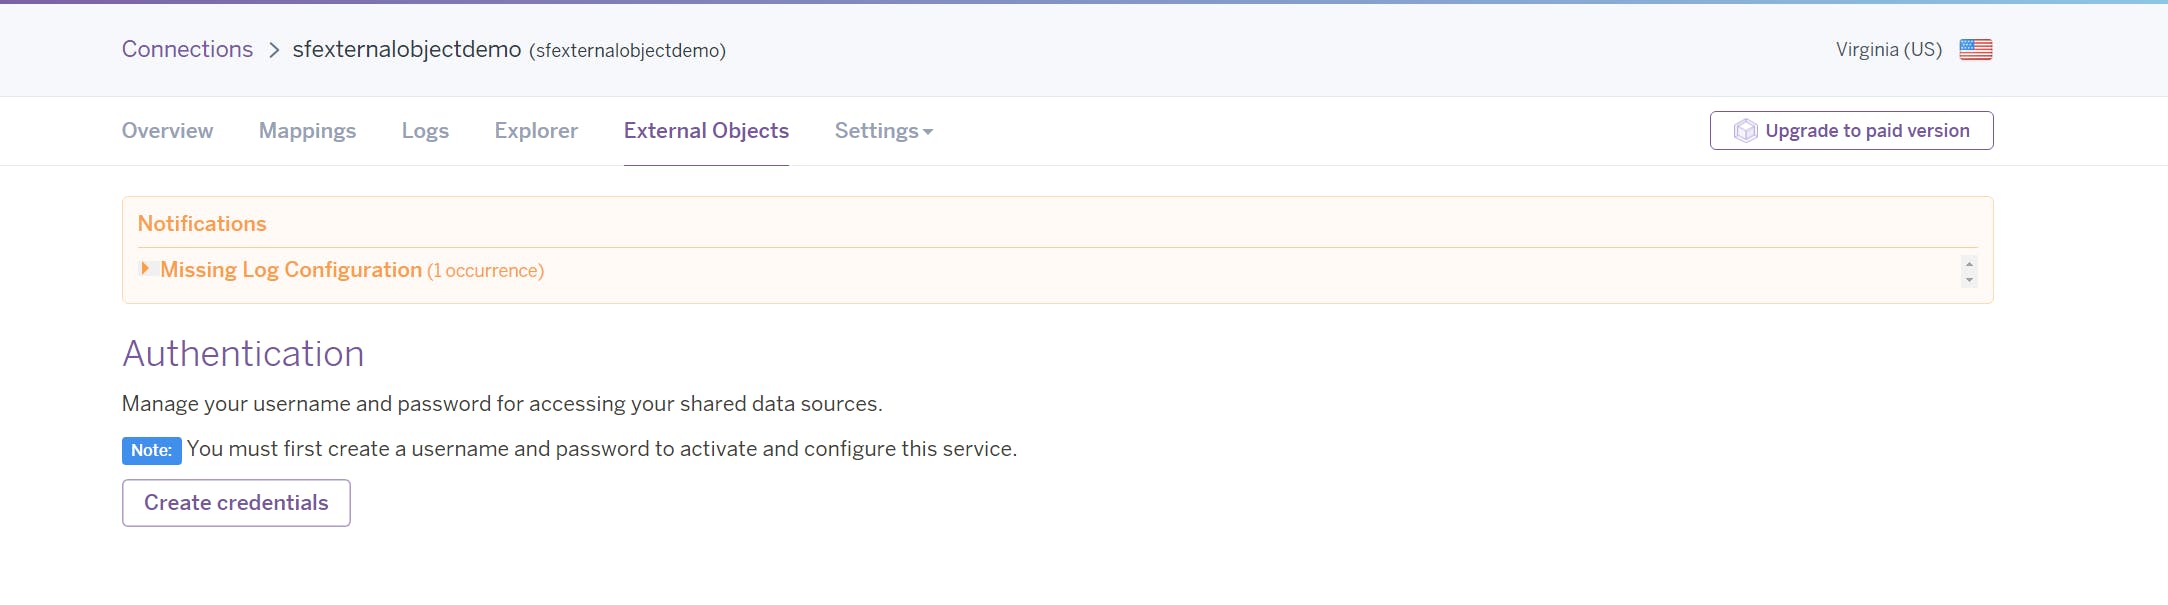
Click
Create Credential. This would create a OData 4 url, which we can use to create our External Data Source. Also clickShow Credentialto view the credential for OData connection.Also check the
Data Sourcewhich you want to sync, in our case, itstransactions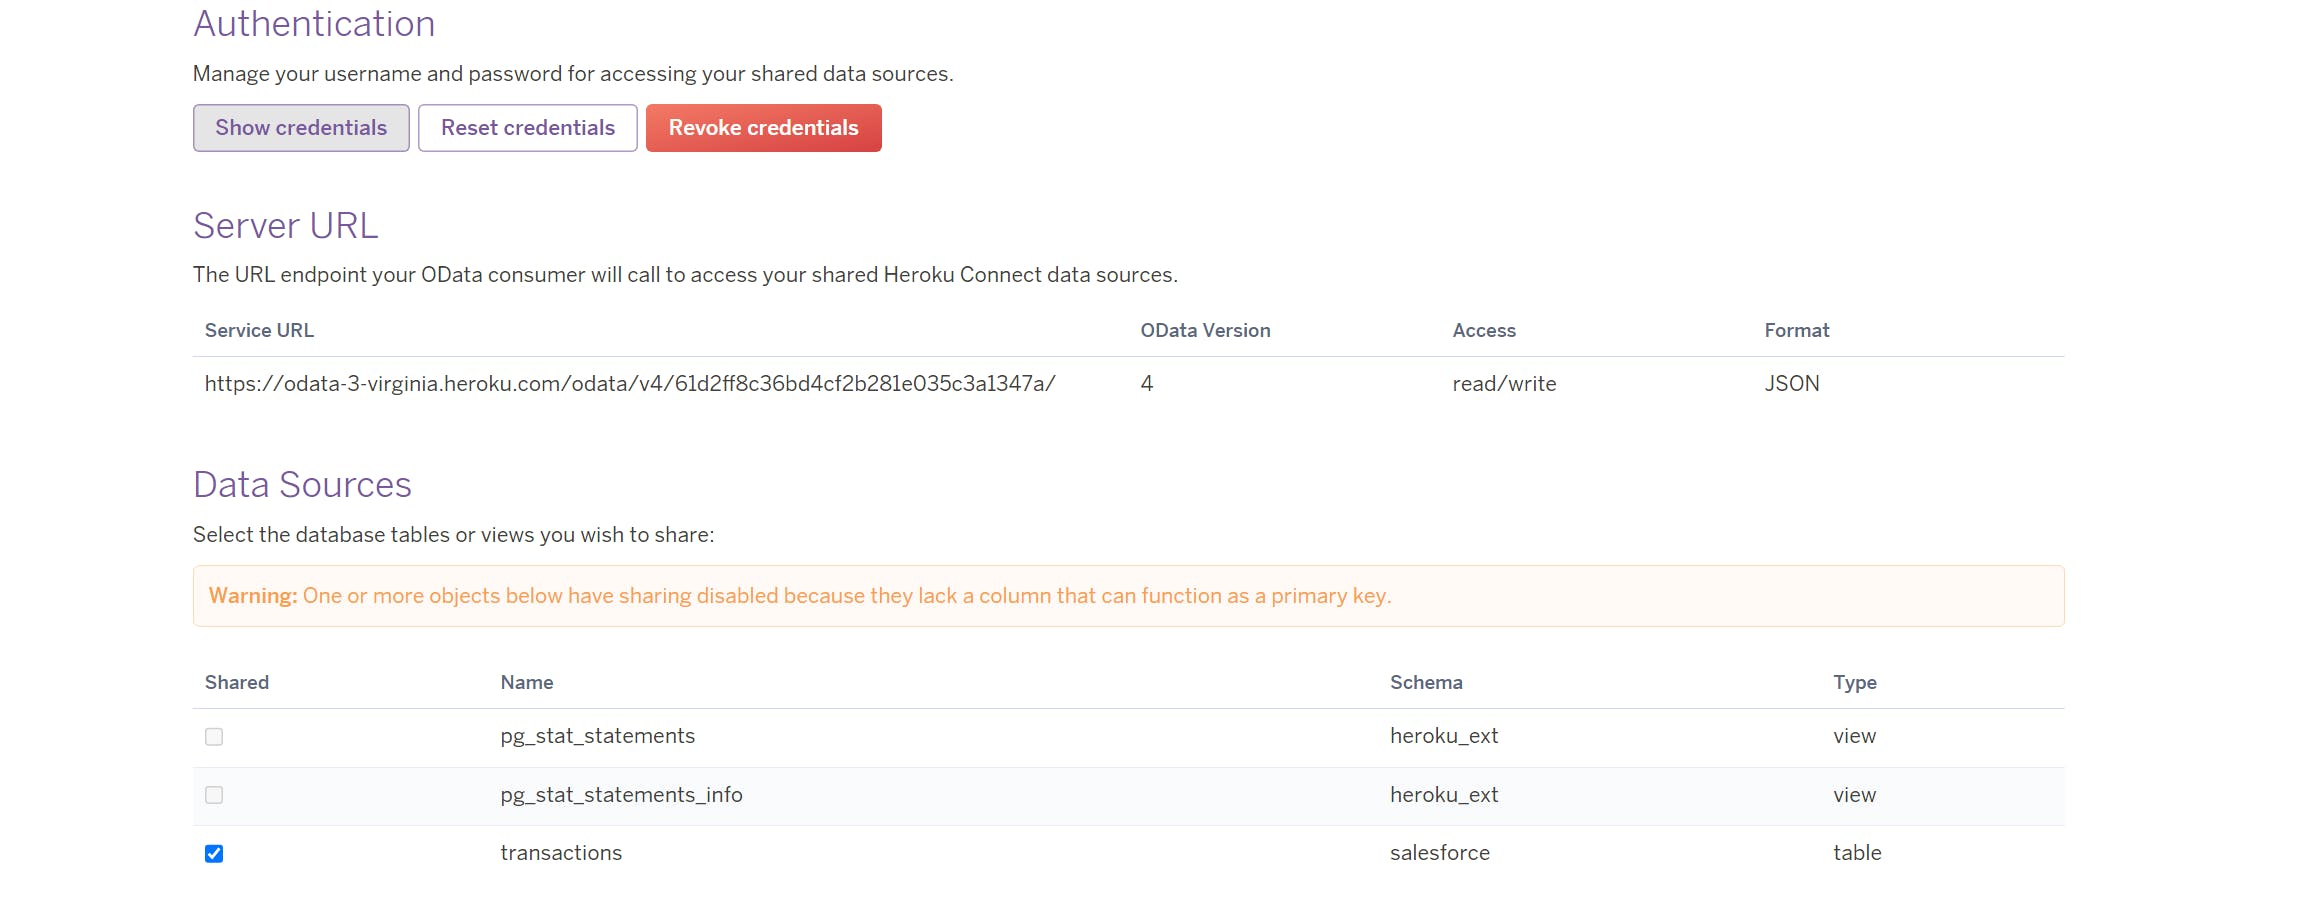
Now, lets setup our
External DataSource andExternal Objectin Salesforce.Create a new "New External Data Source" give name as "Account Transaction Source" and enter the data as below and click
Save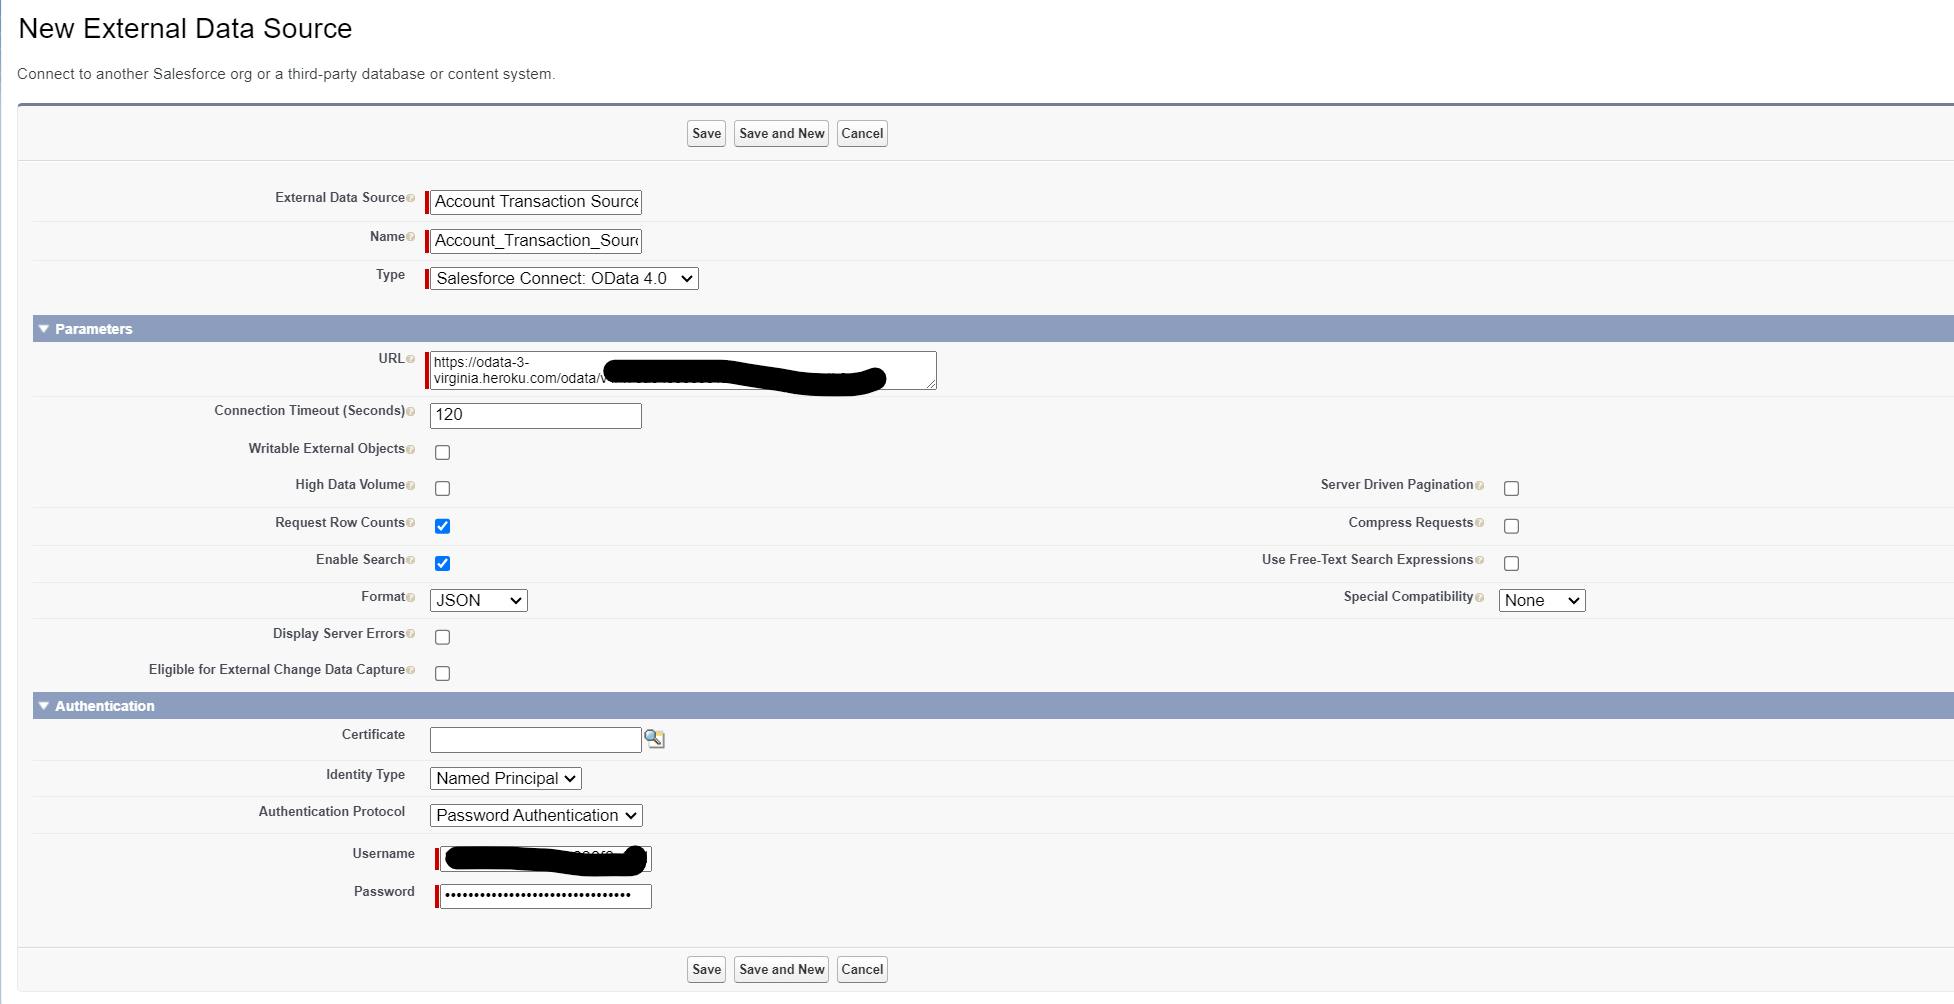
After Save, you can either click
Validate and Syncor create external object separately and then click validate and sync. For this demo purpose, let's choose the shorter path and clickValidate and Sync. Here you can choose to change the External object name to your choice. I chooseAccountTransactionsand clickSync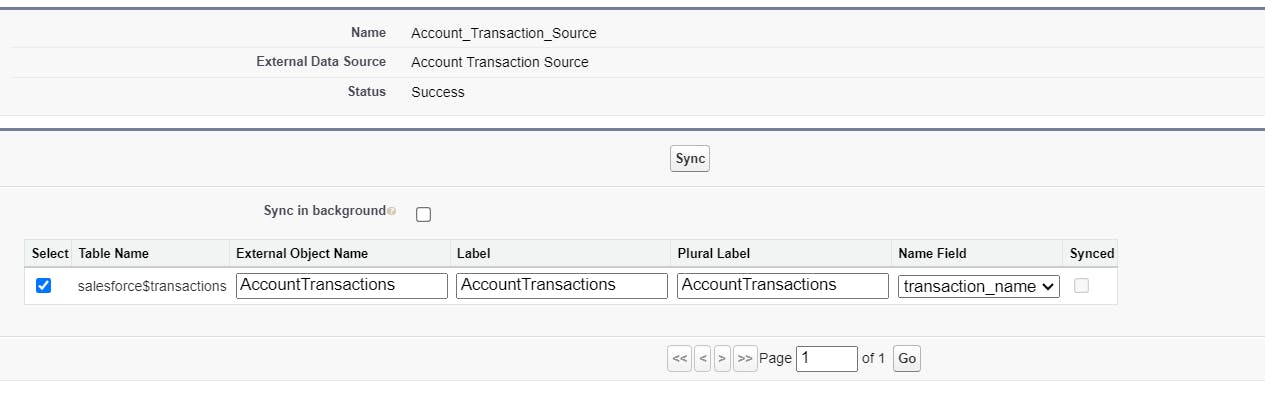
Woohoo!!!! No errors and the data has been synced! If you go to the
AccountTransactionsTab, you can see the data. But HOLD ONNNNNN! Our goal to display this information under the specific account is still pending. Let get that done.Go to External Object and edit the
account_externalfield. Change the field type toIndirect Lookup Relationship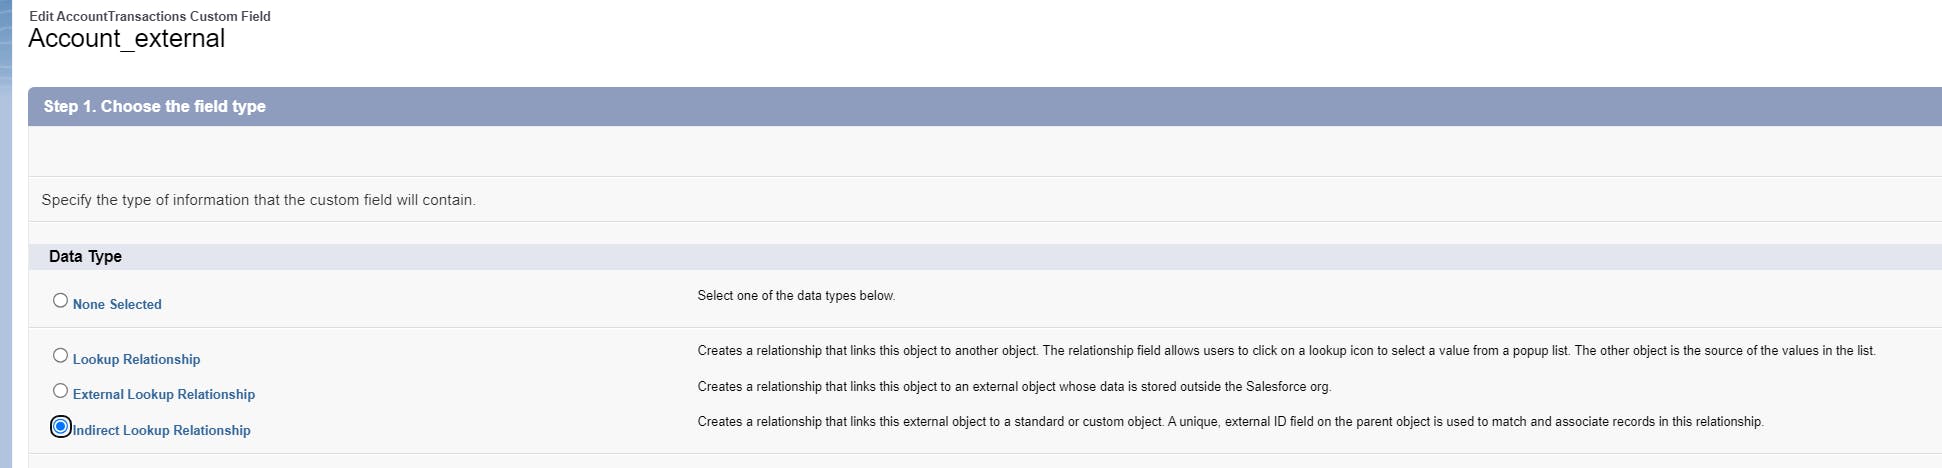
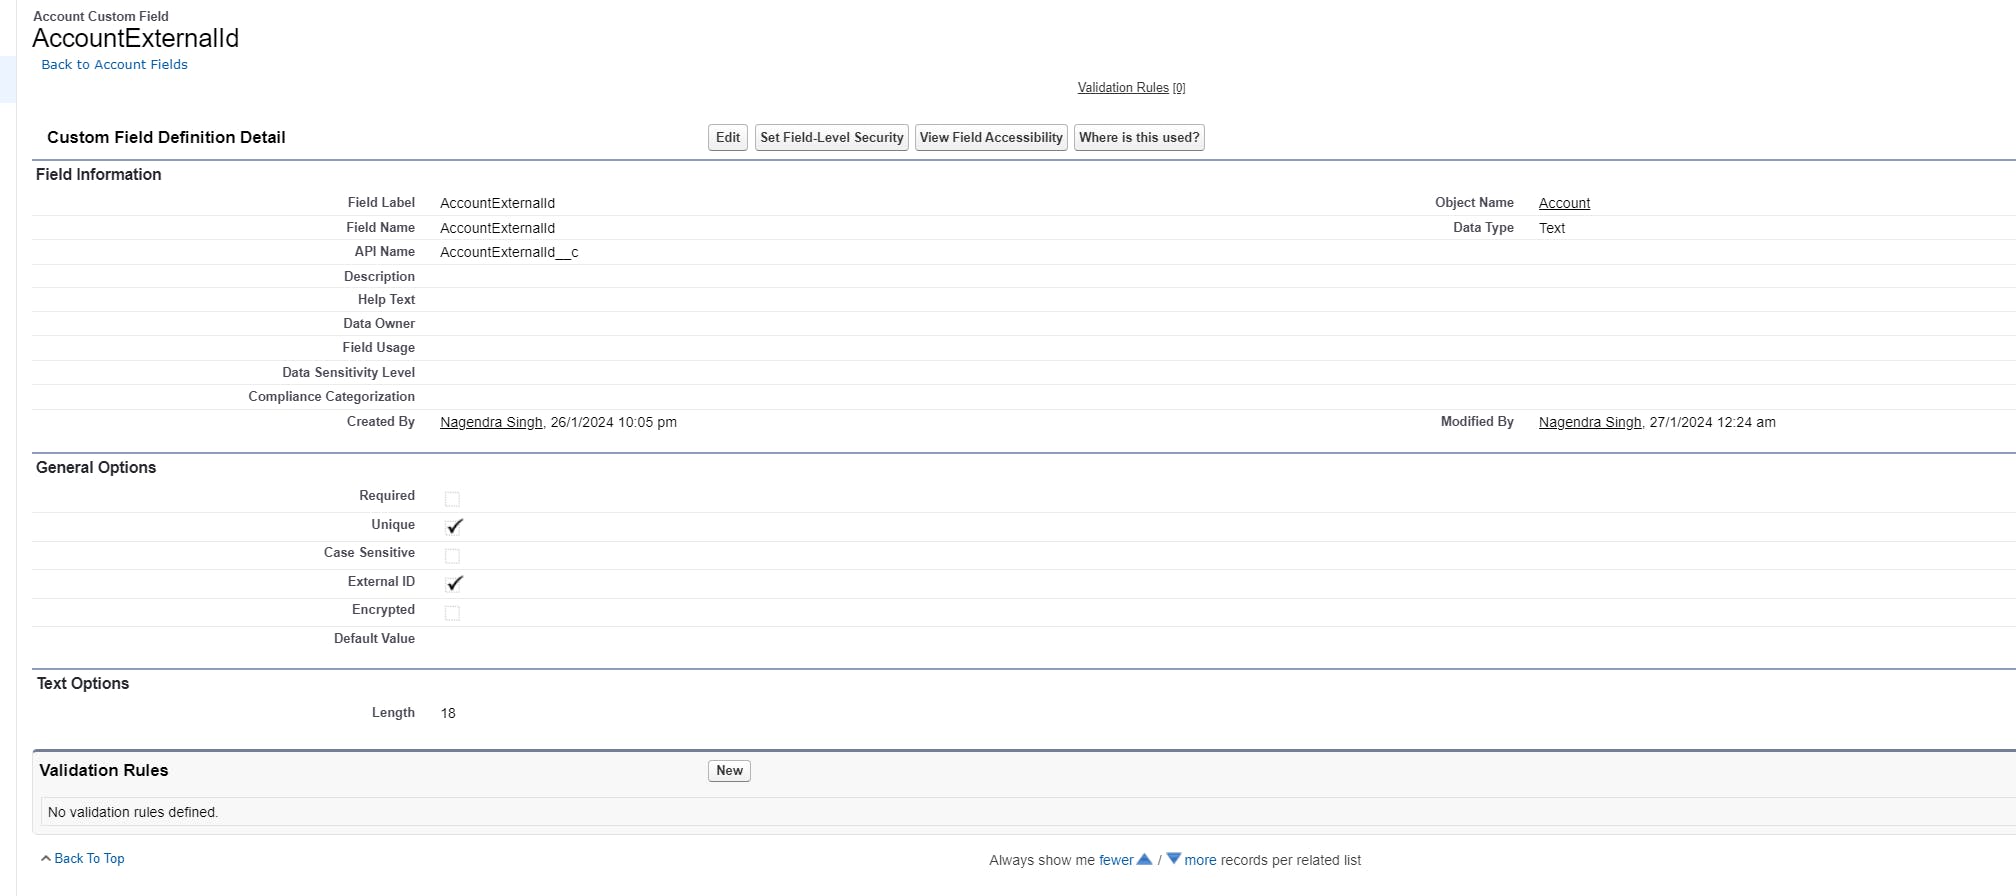
In the next screen select Account as our Account object has a external id field as
AccountExternalId. Note: This is very important, for a Indirect relationship to work, the object should have an external Id which is unique.
In next screen select the Target field, via which the process would find the correct account.

Leave the next screen as it as, as the external column remains same, and click
Save.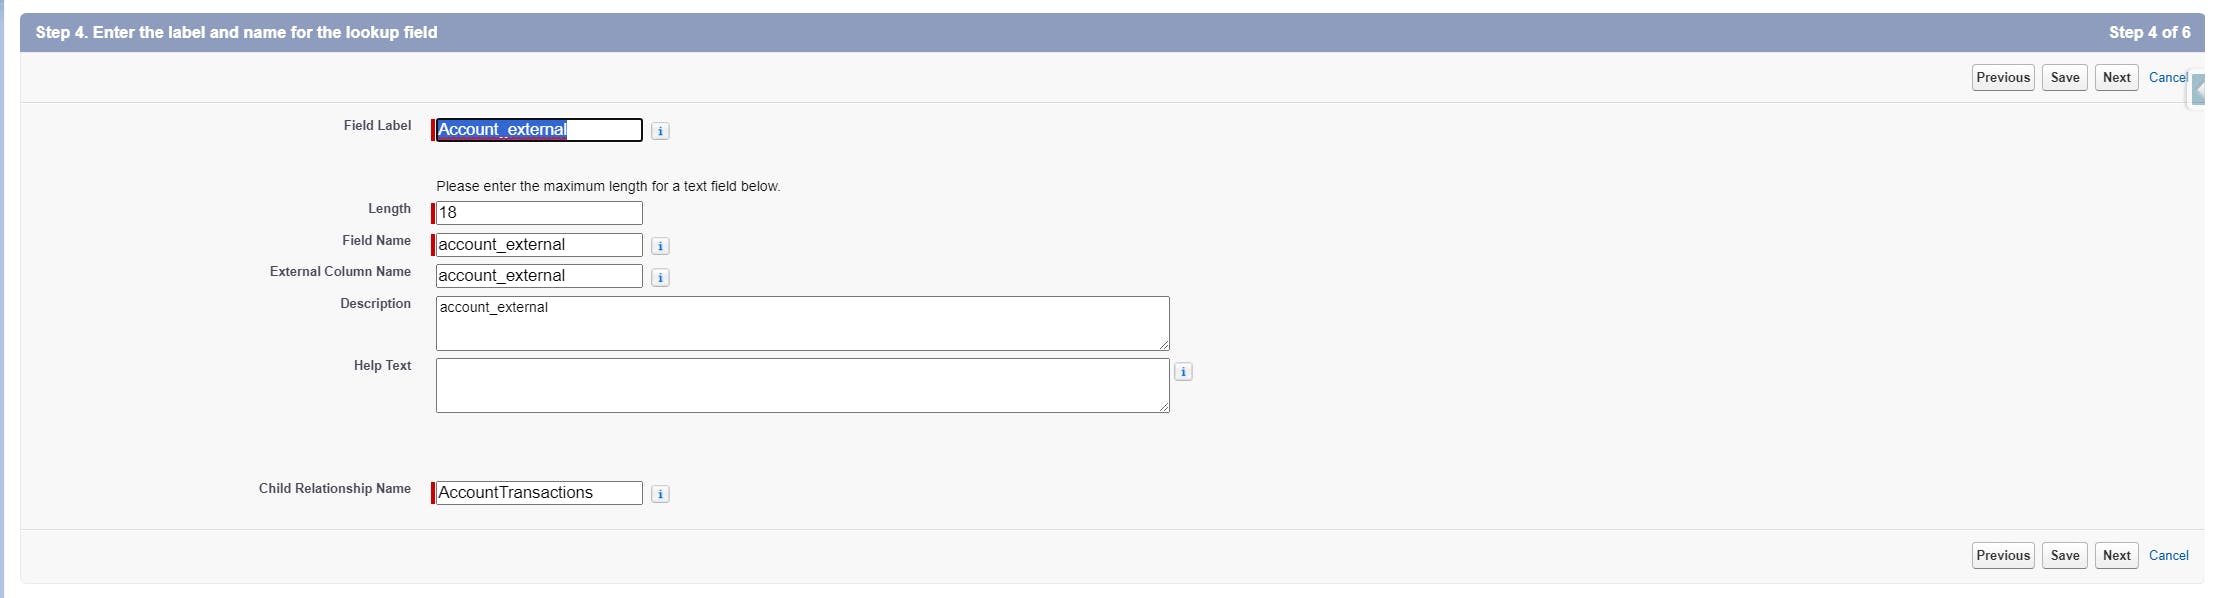
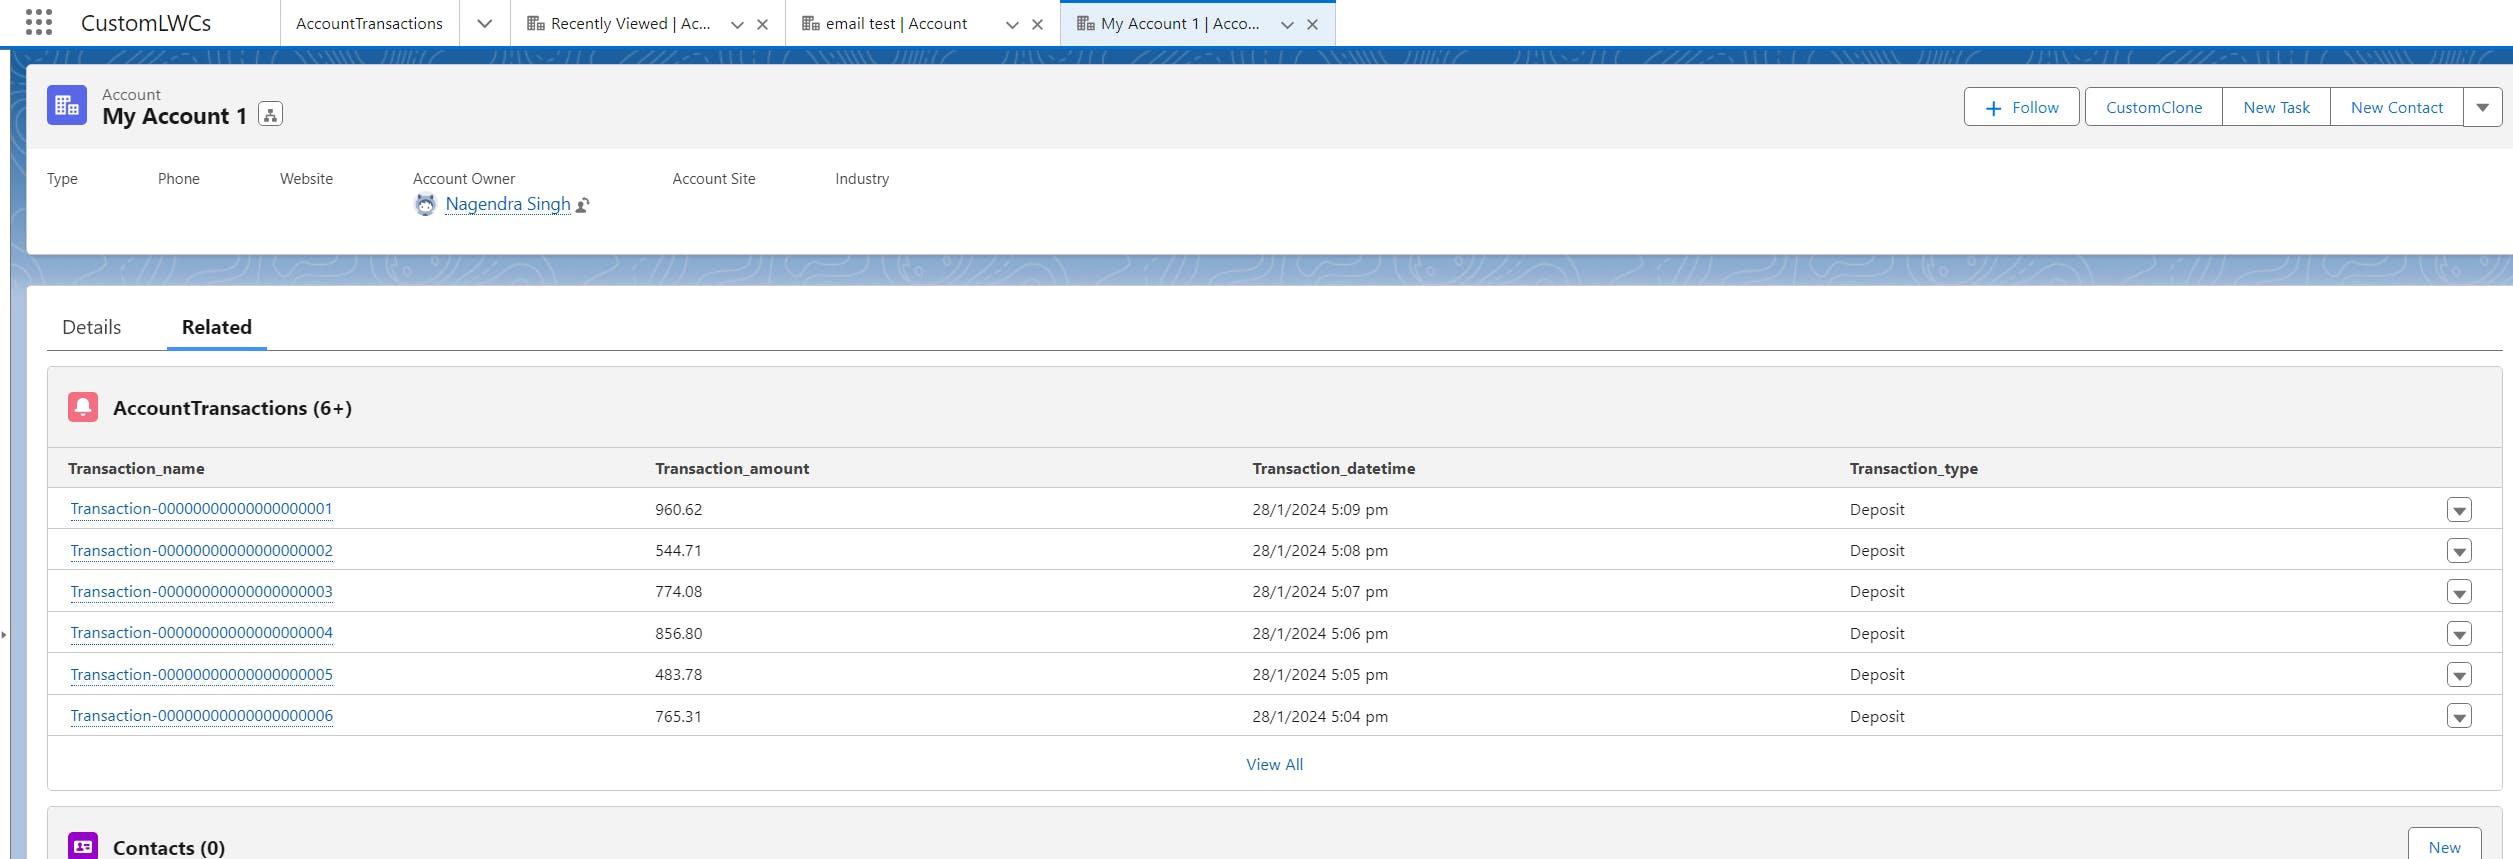
Woohoo! Now the transaction data has been successfully linked to the Account with
AccountExternalIdas 123123!Here is the account related list below.
So the catch here is to sync all data as a text then change the lookup relationships accordingly.
You can insert some more data in your Postgres Database with some different external Id, and view if the data appears under another account.
Conclusion
This article provides a comprehensive guide on Salesforce External Objects, which are a part of Salesforce Connect, allowing real-time access to data stored outside Salesforce. It discusses the significance of these objects, their behavior, the OData protocol, and use cases. The article then provides a step-by-step tutorial on setting up external objects and data sources, beginning with a list of prerequisites including a Heroku account, Heroku Postgres, Heroku Connect Add-on, and Salesforce Org. The tutorial is based on a scenario where transaction data from Heroku Postgres Database is integrated into Salesforce. The process includes creating a new app in Heroku, setting up Heroku Connect and Heroku Postgres, creating a table in the database, syncing data, and setting up External Data Source and External Object in Salesforce. The tutorial concludes with the successful linking of transaction data to the Account.